Some time ago, I wrote the post Upload a package to PyPI, but, how everything evolves, this time I decided to evolve and take advantage of all the power of GitHub Actions.
GitHub actions
GitHub actions allows us to automate, customize and execute development workflows right in our github repositories. With GitHub actions we can automate a lot of tasks (build, tests, deployments, code reviews, issue management…) when an event occurs in our repository. GitHub actions it’s a very powerful tool, I have to say that, for me, it has been like discovering a new world.
To automate our tasks, GitHub will suggest us some workflows based on the repository type, we can create our own workflows, but we can use workflows created by other users using the Actions Marketplace and we can modfify workflows done by other users (advantages of the open source :P).
In my case, I want to automate the publishing of my project fail2bangeolocation to testpypi.org and pypi.org under certain events. The first thing I though about was taking advantage of some workflow written by the community. But, after reviewing some workflows in GitHub and the Actions Marketplace, I saw that they didn’t quite fit what I wanted, and I decided to write my own workflow based on some of them.
Publishing using GitHub actions
Requirements
A package with the required structure
To publish our python package to pypi.org, we’ll need to adhere to a specific project structure. The structure can vary a bit, but, there is a basic example of the required structure:
1
2
3
4
5
6
7
8
9
10
11
12
13
/project
├── LICENSE
├── pyproject.toml
├── README.md
├── requirements.txt
├── src
│   ├── project
│   │   ├── module
│   │   │   └──...
│   │   └──...
│   └──...
└── tests
    └──...
testpypi.org and pypi.org accounts
Having a testpypi.org it’s optional, but it’s recomended. Uploading the package first to testpypi.org, we can check if there are problems, and we can check how the upload went before going into production (publishing in pypi.org).
Configuring trusted publishing
Trusted publishing exchanges short-lived tokens (using OpenID Connect (OIDC)) between a trusted third-party service (in our case GitHub) and testpypi.org and/or pypi.org. Trusted publishing method can be used in automated environments and eliminates the need to use manually generated API tokens to authenticate with testpypi.org and/or pypi.org when publishing.
The steps to crete a [pending] publisher in testpypi.org and pypi.org, are basically the same.
I had the project upload to testpypi.org and pypi.org, but If you don’t have your project uploaded yet, you can create a “pending” trusted publisher.
Configuring trusted publishing in testpypi
We go to our testpypi.org account, we go to “Your projects” and we select our project (in my case fail2bangeolocation), and we click in “Manage”:
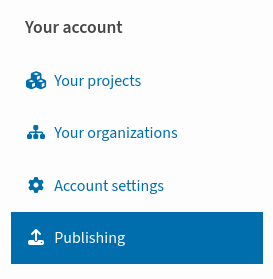
We go to “Publishing”:
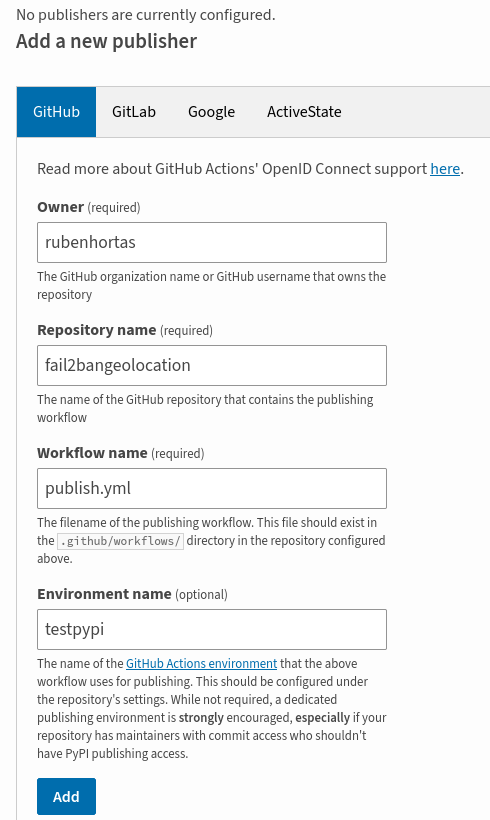
Under “Trusted Publisher Management” we add a new publisher:
Here we will set the owner, the repository name, the workflow name and the environment name:
- Owner: Our github user.
- Repository name: Our github repository name.
- Workflow name: The file name of our (future) workflow, here I will use “publish.yml”.
- Enviromnment name: The name of the GitHub Actions environment that the workflow will use, here I will use “testpypi”.
We have to pay attention to the workflow and environment names. We will need them later.
Click on “Add” and we are done! ;)
It should be noted that, many times, we will not be able to install the package generated in testpypi in on our machine (or it may not work) due to dependency problems. This is because the same packages (or the same versions) may not be available in testpypi as in pypi.
Configuring trusted publishing in pypi:
We go to our pypi.org account, we go to “Your projects” and we select our project (in my case fail2bangeolocation), and we click in “Manage”:
We go to “Publishing”:
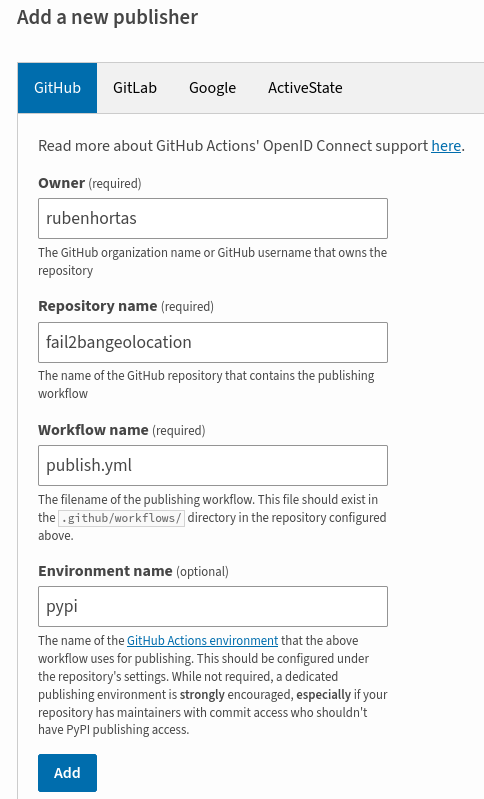
Under “Trusted Publisher Management” we add a new publisher:
Here we will set the owner, the repository name, the workflow name and the environment name:
- Owner: Our github user.
- Repository name: Our github repository name.
- Workflow name: The file name of our (future) workflow, here I will use “publish.yml”.
- Enviromnment name: The name of the GitHub Actions environment that the workflow will use, here I will use “pypi”.
We have to pay attention to the workflow and environment names. We will need them later.
Click on “Add” and we are done! ;)
Adding the workflow
The worflow file name has to match the name we gave it when we created the trusted trusted-publishers
GitHub CI/CD workflows are declared in YAML files stored in the .github/workflows/ directory of our repositories. So, we can create a .github/workflows/publish.yml file, or, we can create it from the GitHub web interface.
To create the action from the GitHub web interface, we go to our repository and select “Actions”:
Now, we will see some suggested actions for our repository, but, this time, we will create our own clicking in “set up a workflow yourself”:
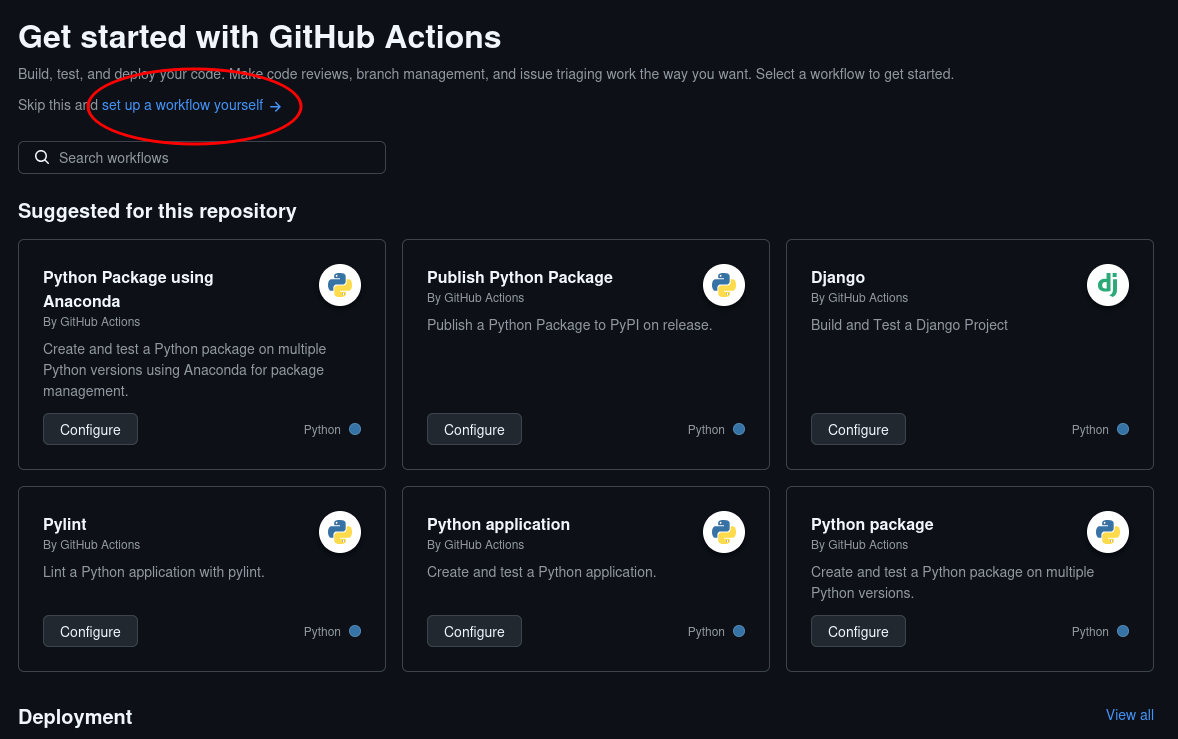 Get started with GitHub Actions - Set up a workflow yourself
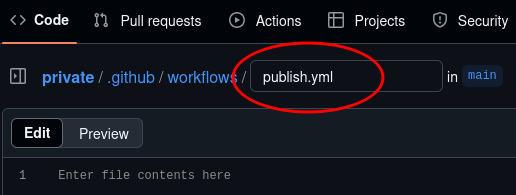
In the editor, we have to create a workflow with a file name that matches the name we gave it when we created the trusted-publishers:
We write (or paste) our workflow, we commit the changes and we are ready to publish!
The workflow
The environment names have to match with the enviroment names we gave them wen we created the trusted-publishers.
You can see my workflow here: fail2bangeolocation publish.yml, but I’m going to copy it and explain it (briefly) here below:
1
2
3
4
5
6
7
8
9
10
11
12
13
14
15
16
17
18
19
20
21
22
23
24
25
26
27
28
29
30
31
32
33
34
35
36
37
38
39
40
41
42
43
44
45
46
47
48
49
50
51
52
53
54
55
56
57
58
59
60
61
62
63
64
65
66
67
68
69
70
71
72
73
74
75
76
77
78
79
80
81
82
83
84
85
86
87
88
89
90
91
92
93
94
95
96
97
98
99
100
101
102
103
104
105
106
107
108
109
name: Publish Python distribution 🐍📦

# The workflow is triggered when events taht include that includes tagas starting with v*.*.* or test_v*.*.*. are sent to the repository.
on:
  push:
    tags:
      - 'v*.*.*'
      - 'test_v*.*.*'

jobs:
# Builds the pythond distribution (wheel and source tarball)
  build:
    name: Build distribution 📦
    runs-on: ubuntu-latest

    steps:
    - uses: actions/checkout@v4 # Checkout the code
    - name: Set up Python
      uses: actions/setup-python@v5 # Set up the Python environment
      with:
        python-version: "3.x"
    - name: Install pypa/build # Install the build tool
      run: >-
        python3 -m
        pip install
        build
        --user
    - name: Build a binary wheel and a source tarball
      run: python3 -m build # Build the package
    - name: Store the distribution packages # Temporarily store the build artifacts in the dist directory under the name python-package-distributions
      uses: actions/upload-artifact@v4
      with:
        name: python-package-distributions
        path: dist/

# Publishes the built package to TestPyPI (for testing) if the tag starts with test_v.*
  publish-to-testpypi:
      name: Publish to TestPyPI 🐍📦
      needs:
        - build # Start the job only if the build job has completed
      runs-on: ubuntu-latest

      environment:
        name: testpypi # Enter the environment name set in the Publisher
        url: https://test.pypi.org/p/example-package-hanaosan0318 # Project URL

      permissions:
        id-token: write  # Grant Publishing permissions

      if: startsWith(github.ref, 'refs/tags/test_v') # Conditional check for TestPyPI publishing

      steps:
      - name: Download all the dists # Download the build artifacts that were saved earlier
        uses: actions/download-artifact@v4
        with:
          name: python-package-distributions
          path: dist/
      - name: Publish distribution 📦 to TestPyPI # Publish to TestPyPI
        uses: pypa/gh-action-pypi-publish@release/v1
        with:
          repository-url: https://test.pypi.org/legacy/

Publishes the built package to PyPI (production) if the tag starts with v.*
  publish-to-pypi:
      name: Publish to PyPI 🐍 📦
      needs:
        - build # Start the job only if the build job has completed
      runs-on: ubuntu-latest

      environment:
        name: pypi # Enter the environment name set in the Publisher
        url: https://pypi.org/p/example-package-hanaosan0318 # Project URL

      permissions:
        id-token: write

      if: startsWith(github.ref, 'refs/tags/v') # Conditional check for PyPI publishing

      steps:
      - name: Download all the dists
        uses: actions/download-artifact@v4
        with:
          name: python-package-distributions
          path: dist/
      - name: Publish distribution 📦 to PyPI
        uses: pypa/gh-action-pypi-publish@release/v1

  github-release:
      name: Create GitHub Release with source code 📦
      needs:
        - publish-to-pypi # Start the job only if the PyPI publishing job has completed
      runs-on: ubuntu-latest

      permissions:
        contents: write # Grant permission to create a GitHub release

      steps:
      - name: Checkout code
        uses: actions/checkout@v4 # Checkout the code

      # I had to escape the braces in the following block. Replace them if you copy this.
      - name: Create GitHub Release
        env:
          GITHUB_TOKEN: $\{\{ secrets.GITHUB_TOKEN \}\} # A temporary token that is automatically generated each time the workflow is run
        run: >-
          gh release create
          '$\{\{ github.ref_name \}\}'
          --repo '$\{\{ github.repository \}\}'
          --notes "Release for version $\{\{ github.ref_name \}\}"
publish.yml workflow TL;DR
This workflow automates building, publishing (to testpypi.org and pypi.org), and creating a GitHub release for your Python package.
This workflow is triggered when a version tag is pushed. The tag will be a label that match the patterns test_v*.*.* or v*.*.*..
This workflow will do a (slightly) different job depending on the type of tag:
If a
test_v*.*.*tag (e.g.test_v1.0.1) is pushed, a test version will be generated. The workflow will build the distribution packages and upload them to testpypi.org.If a
v*.*.*tag (e.g.v1.0.1) is pushed, the relase version will be generated. The workflow will build the packages, upload them to pypi.org and generate the GitHub release.
Why I decided to write my own workflow?
The reason why I decided to write my own workflow is because the workflows I saw depended on other events, and, usually, they did a lot of work together (as publish to testpypi.org, pypi.org and generate the GitHub release at the same time). I prefer a slightly more structured workflow, based on pushing version tags. And, I want to perform slightly different actions based on these tags.
Publishing the test version first in testpypi.org let me know if there are any errorsm and let me know the result of the distribution files. Once I have verified that the upload to testpypi.org is correct, and the distribution files have been checked, I can generate the production version, upload it to pypi.org and generate the GitHub release.
Why I wanted to publish based on tags?
When you upload a package to testpypi.org or pypi.org, you can’t repeat versions. With this workflow I can create a dev branch to add changes and upload test versions to testpypi.org. In case there are errors when uploading to testpypi.org, I can increase the project version, until everything is correct, without affecting the production version number. Once everything is correct I can merge the dev branch changes into the main branch, tag the production version in main, and the production release will be generated automatically (ideally without errors). Once the release version is published I will take care of cleaning up the versions in testpypi.org, and, if necessary, in pypi.org.
Enjoy! ;)

