Learn how to transform Neovim into a modern, fast and modular IDE for Python, Rust, and Standard C using init.lua, lazy.nvim, mason.nvim and a few plugins.
Why?
I’ve been using Neovim as my IDE for a long time, and as I keep adding programming languages to it, it’s becoming increasingly tedious to add options and merge sections in the init.vim file, mixing VimScriptand lua. Sometimes, upgrading certain components can be a real pain. To solve this, I decided to switch to a modular approach.
Moving from a monolithic init.vim to a modular Lua-based setup is a great move for Neovim. Lua is significantly faster than VimScript and allows for much cleaner organization as your configuration grows. Switching from init.vim (VimScript) to init.lua (Lua) is considered the “modern standard” for Neovim in 2026 for several technical and organizational reasons. While VimScript served us well for decades, Lua transforms Neovim from a text editor into a highly extensible development platform.
Advantages
Performance
Lua is a significantly faster language than VimScript. Neovim includes a LuaJIT (Just-In-Time) compiler, which makes the execution of complex configurations and plugins near-instant. Also, as your config grows to include hundreds of plugins and complex logic, Lua handles the overhead much better, and heavy tasks (like syntax tree parsing -Treesitter- or asynchronous linting) are handled more efficiently in Lua.
Integration with the Neovim API
In the past, interacting with Neovim’s internals via VimScript often felt like using “hacks.”
With Lua, Neovim provides a first-class API (vim.api, vim.lsp, vim.diagnostic), so you aren’t just sending strings to a command line; you are calling structured functions that return tables and objects.
Neovim’s most powerful modern features (LSP & Tree-sitter) are written in Lua. Configuring them in their “native” language reduces the complexity of translation layers.
Modularity
VimScript was never designed to be a general-purpose programming language. Creating a modular setup in init.vim is clunky.
Lua’s require() function allows you to split your config into logical files (e.g., options.lua, keymaps.lua, plugins/lsp.lua) effortlessly.
Lua has proper local scoping, meaning variables in one file won’t accidentally overwrite variables in another, preventing “spaghetti code” bugs.
Plugin ecosystem
The most innovative plugins in 2026 (like Telescope, Lazy.nvim, and Oil.nvim) are written exclusively in Lua.
Instead of learning obscure VimScript commands, you configure plugins using standard Lua tables, which is more intuitive for developers coming from other languages.
It is much easier to write your own small helper functions or “mini-plugins” in Lua to customize your workflow.
Modern language features
Lua is a widely used, portable language and has a clean and readable syntax. You can use Lua Language Servers (lua-ls) to get autocompletion and linting while writing your own config.
Better alternatives and All-In-One IDE
Aside from all this advantages, when I started migrating to a modularized version, I found better alternatives to the components I was using. With this configuration, it’s trivial to turn Neovim into a modern IDE for Python, Rust and Standard C, and to add and remove components and configurations. Maintenance is now a breeze, saving me a SIGNIFICANT amount of time when fine-tuning my environment.
Upgrade Neovim
In my case, I’m running Debian Stable, and the version of Neovim’ available in the repositories is 0.10.x. If you, like me, are using an older version of Neovim’, it’s best to update to a nightly build (or at least version 0.11.x) to avoid errors with LSP (Language Server Protocol).
To install the latest Neovim nightly build:
1
2
3
4
5
6
7
wget https://github.com/neovim/neovim/releases/download/v0.11.6/nvim-linux-x86_64.appimage
sudo mkdir /opt/nvim
sudo mv nvim-linux-x86_64.appimage /opt/nvim
sudo chown "$USER":"$USER" -R /opt/nvim
sudo chmod 755 /opt/nvim/nvim-linux-x86_64.appimage
sudo ln /opt/nvim/nvim-linux-x86_64.appimage /usr/bin/vim
sudo ln /opt/nvim/nvim-linux-x86_64.appimage /usr/bin/nvim
Basic configuration
Modularize
A modular setup means instead of one giant file, you have a folder structure like this:
1
2
3
4
5
~/.config/nvim/
├── init.lua          -- Entry point
└── lua/
    ├── config/       -- General settings (options, keymaps)
    └── plugins/      -- Plugin specifications
This makes it much easier to debug. If something breaks, you only have to look at one small file rather than scrolling through 1000 lines of code.
We will create this structure:
1
2
3
4
5
6
7
8
9
10
11
# Create the core config file
touch ~/.config/nvim/init.lua

# Create the main configuration folders
mkdir -p ~/.config/nvim/lua/config
mkdir -p ~/.config/nvim/lua/plugins

# Create the core config files
touch ~/.config/nvim/lua/config/options.lua
touch ~/.config/nvim/lua/config/keymaps.lua
touch ~/.config/nvim/lua/config/lazy.lua
One-liner: touch ~/.config/nvim/init.lua && mkdir -p ~/.config/nvim/lua/config && mkdir -p ~/.config/nvim/lua/plugins && touch ~/.config/nvim/lua/config/options.lua && touch ~/.config/nvim/lua/config/keymaps.lua && touch ~/.config/nvim/lua/config/lazy.lua
~/.config/nvim/init.lua
We need to tell Neovim to look into these files. For this we will add the following lines to our init.lua file:
1
2
3
4
5
6
7
8
9
-- Force Neovim and all subprocesses (LSPs) to use English
vim.env.LANG = "en_US.UTF-8"
vim.env.LC_ALL = "en_US.UTF-8"

-- Load basic settings
require("config.options")

-- Load keybindings
require("config.keymaps")
~/.config/nvim/lua/config/options.lua
1
2
3
4
5
6
7
8
9
10
11
12
13
14
15
16
17
18
19
20
21
22
23
24
25
26
27
28
29
30
31
32
33
34
35
36
37
38
39
40
41
42
43
44
45
46
47
-- ==============================================================================
-- CORE FUNCTIONALITY AND FILETYPE
-- ==============================================================================
-- vim.cmd("syntax on")              -- Enable syntax highlighting (Disable if nvim-treesiter is installed)
vim.opt.encoding = "utf-8"           -- Set file and terminal encoding to UTF-8

-- ==============================================================================
-- INDENTATION AND TABS (Using 4-space soft tabs)
-- ==============================================================================
vim.opt.autoindent = true           -- Copy indentation from the previous line
vim.opt.smartindent = true          -- Enable smarter automatic indentation
vim.opt.expandtab = true            -- Use spaces instead of actual tabs
vim.opt.tabstop = 4                 -- A Tab character is rendered as 4 spaces wide
vim.opt.shiftwidth = 4              -- Auto-indent commands (e.g., >>) use 4 spaces
vim.opt.softtabstop = 4             -- Tab/Backtab keys use 4 spaces when inserting

-- ==============================================================================
-- UI AND APPEARANCE
-- ==============================================================================
vim.opt.number = true               -- Show absolute line number
-- vim.opt.wildmenu = true          -- Enhanced command-line completion menu (Disable if nvim-cmp is installed)
vim.opt.mouse = "a"                 -- Enable mouse support
vim.opt.updatetime = 250            -- Sets the delay (ms) for showing diagnostics and tooltips (important for LSP)

-- ==============================================================================
-- SEARCH
-- ==============================================================================
vim.opt.path:append("**")           -- Allow searching for files recursively (e.g., :find filename)
vim.opt.incsearch = true            -- Show results as you type the search pattern (incremental search)
vim.opt.hlsearch = true             -- Highlight all matches of the last search pattern
vim.opt.ignorecase = false          -- Ignore case when searching
vim.opt.smartcase = true            -- Override ignorecase if the search pattern contains uppercase letters

-- ==============================================================================
-- BEHAVIOR AND SYSTEM INTEGRATION
-- ==============================================================================
vim.opt.backspace = "indent,eol,start" -- Ensures backspace works as expected
vim.opt.clipboard = "unnamedplus"      -- Integrate with system clipboard for yank/put (requires external tool)
vim.opt.swapfile = false               -- Disable swap files to prevent clutter
vim.opt.undofile = true                -- Enable persistent undo history

-- Specify a directory for undo files and create it if it doesn't exist
local undodir = vim.fn.expand("~/.config/nvim/undodir")
if vim.fn.isdirectory(undodir) == 0 then
    vim.fn.mkdir(undodir, "p")
end
vim.opt.undodir = undodir
~/.config/nvim/lua/config/keymaps.Lua
We will keep our shortcuts (or keybindings) here:
1
2
3
4
5
6
7
8
9
10
11
-- ==============================================================================
-- KEYMAPS
-- ==============================================================================

-- Set leader key to space
vim.g.mapleader = " "
vim.g.maplocalleader = " "

-- General quality of life
vim.keymap.set("n", "<leader>pv", vim.cmd.Ex, { desc = "Return to File Explorer" })
vim.keymap.set("n", "<Esc>", "<cmd>nohlsearch<CR>", { desc = "Clear search highlights" })
Lazy.nvim
lazy.nvim is a modern plugin manager. It “lazy-loads” plugins, meaning they only start when you actually need them (e.g., Python tools only load when you open a .py file), keeping Neovim’s startup time near-instant. It has a beautiful UI to see updates and errors. It uses a lazy-lock.json file to ensure your plugins are the exact same version across different machines.
We need to add the following lines to our init.lua file:
1
2
-- Load lazy.nvim (plugin manager)
require("config.lazy")
~/.config/nvim/lua/config/lazy.Lua
This file handles the automatic installation of the plugin manager itself if it’s missing (bootstrapping).
1
2
3
4
5
6
7
8
9
10
11
12
13
14
15
16
17
18
19
20
21
22
23
-- Bootstrap lazy.nvim (Automatic install if not present)
local lazypath = vim.fn.stdpath("data") .. "/lazy/lazy.nvim"
if not vim.loop.fs_stat(lazypath) then
  vim.fn.system({
    "git",
    "clone",
    "--filter=blob:none",
    "https://github.com/folke/lazy.nvim.git",
    "--branch=stable", -- latest stable release
    lazypath,
  })
end
vim.opt.rtp:prepend(lazypath)

-- Initialize lazy.nvim
require("lazy").setup({
  spec = {
    -- This tells lazy.nvim to look in the lua/plugins folder for plugin files
    { import = "plugins" },
  },
  install = { colorscheme = { "habamax" } }, -- Fallback colorscheme
  checker = { enabled = true },              -- Automatically check for updates
})
Because we set up
~/.config/nvim/lua/config/lazy.luawith the{ import = "plugins" }command,lazy.nvimwill automatically scan every file in your lua/plugins/ directory.
lualine
lualine is a fast, highly customizable statusline written in Lua. Its job is to turn the boring gray bar at the bottom of Neovim into an informative dashboard.
- Mode Indicator: Changes color based on whether you are in NORMAL, INSERT, or VISUAL mode.
- Git Integration: Shows your current branch and how many lines have been added, modified, or removed (without needing any LSP).
- File Info: Displays the filename, file type (Python, Rust, etc.), and file encoding (UTF-8).
- LSP/Diagnostic Status: It automatically “listens” to the Diagnostic UI we built. If there are 2 errors in your code, Lualine will show a small red “2” in the corner.
- Performance: It is famous for being “lightweight,” meaning it won’t slow down your cursor movement or startup time
~/.config/nvim/lua/plugins/lualine.lua
1
2
3
4
5
6
7
8
9
10
11
12
13
14
15
16
17
18
19
20
21
22
23
24
return {
{
"nvim-lualine/lualine.nvim",
dependencies = { "nvim-tree/nvim-web-devicons" }, -- Adds pretty file icons
config = function()
require("lualine").setup({
options = {
theme = "auto", -- Automatically matches your colorscheme
component_separators = { left = '', right = ''},
section_separators = { left = '', right = ''},
globalstatus = true, -- One single statusline at the bottom for all windows
},
sections = {
lualine_a = {'mode'},
lualine_b = {'branch', 'diff', 'diagnostics'},
lualine_c = {'filename'},
lualine_x = {'encoding', 'fileformat', 'filetype'},
lualine_y = {'progress'},
lualine_z = {'location'}
},
})
end,
},
}
better-whitespace
better-whitespace highlights trailing spaces in red and provides a command (:StripWhitespace) to delete all that extra spaces automatically.
~/.config/nvim/lua/plugins/whitespace.lua
1
2
3
4
5
6
7
8
9
10
11
12
13
14
15
16
17
18
19
20
21
return {
  {
    "ntpeters/vim-better-whitespace",
    config = function()
      -- Highlight whitespace by default
      vim.g.better_whitespace_enabled = 1

      -- Strip whitespace on save (optional, but very useful)
      -- You can disable this if you prefer using conform.nvim for cleaning
      vim.g.strip_whitespace_on_save = 1

      -- Don't show whitespace in certain file types (like binaries or help)
      vim.g.better_whitespace_filetypes_blacklist = {
        'diff', 'gitcommit', 'unite', 'qf', 'help', 'markdown'
      }

      -- Custom keymap to strip whitespace manually
      vim.keymap.set('n', '<leader>sw', ':StripWhitespace<CR>', { desc = 'Strip Trailing Whitespace' })
    end
  }
}
This is my foundational setup, the one I deploy across all my machines, regardless of their purpose.
IDE configuration
The basic setup to turn Neovim into an IDE involves installing mason.nvim, nvim-treesiter and configuring diagnostic ui. From there, we will configure the options for our favorite programming languages.
nvim-treesitter
Traditional Vim uses “Regex” (text patterns) to highlight code, which is often slow and inaccurate. treesitter builds a real syntax tree of your code. treesitter is very fast, updates instantly as you type. treesitter improves how Neovim looks and understands the structure of your code (syntax highlighting), it knows exactly where a function starts and ends, allowing for better indentation and smarter selections.
~/.config/nvim/lua/plugins/treesitter.lua
1
2
3
4
5
6
7
8
9
10
11
12
13
14
15
16
17
18
return {
  {
    "nvim-treesitter/nvim-treesitter",
    build = ":TSUpdate", -- Automatically update parsers when you update the plugin
    config = function()
      local configs = require("nvim-treesitter.configs")

      configs.setup({
        -- Add the languages you use frequently
        ensure_installed = { "lua", "vim", "vimdoc", "python", "rust", "cpp", "c" },

        sync_install = false,
        highlight = { enable = true }, -- The "Magic" button for better colors
        indent = { enable = true },    -- Better auto-indentation based on code structure
      })
    end,
  },
}
Mason.nvim
Think of mason.nvim as a package manager for external dependencies. Neovim itself doesn’t come with Python linters or Rust compilers. Mason allows you to install LSP servers, DAP servers, linters, and formatters directly from inside Neovim with one click (:Mason). Mason keeps these tools isolated for Neovim so you don’t have to clutter your global system path.
To set up Mason easy, we will use a “trio” of plugins that work together:
mason.nvim: The manager.mason-lspconfig.nvim: The “bridge” that connects Mason to Neovim’s built-in LSP client.nvim-lspconfig: The actual configuration for each language.
~/.config/nvim/lua/plugins/lsp.lua
1
2
3
4
5
6
7
8
9
10
11
12
13
14
15
16
17
18
19
20
21
22
23
24
25
26
27
28
29
30
31
32
33
34
35
36
37
38
39
40
41
42
43
44
45
46
47
48
49
50
51
52
53
54
55
56
57
58
59
60
61
62
63
64
65
66
67
return {
  {
    "williamboman/mason.nvim",
    dependencies = {
      "williamboman/mason-lspconfig.nvim",
      "neovim/nvim-lspconfig",
      "hrsh7th/cmp-nvim-lsp",
    },
    config = function()
      local mason = require("mason")
      local mason_lspconfig = require("mason-lspconfig")
      local lspconfig = require("lspconfig")

      -- Initialize Mason
      mason.setup({
        ui = {
          icons = {
            package_installed = "✓",
            package_pending = "➜",
            package_uninstalled = "✗"
          }
        }
    })

    -- Configure mason-lspconfig
    mason_lspconfig.setup({
        ensure_installed = {
          "basedpyright",
          "ruff",
          "rust_analyzer",
          "clangd",
        },
        handlers = {
          function(server_name)
            lspconfig[server_name].setup({
              on_attach = on_attach,
              capabilities = capabilities,
            })
          end,
        }
    })

    -- Standard "Attach" function
    -- This sets up your keymaps ONLY when a language server is active
    local on_attach = function(_, bufnr)
        local opts = { buffer = bufnr, remap = false }

        -- LSP Navigation and Information
        vim.keymap.set("n", "gd", function() vim.lsp.buf.definition() end, opts)                    -- Jump to the definition of the symbol under the cursor
        vim.keymap.set("n", "gD", function() vim.lsp.buf.declaration() end, opts)                   -- Jump to the declaration of the symbol under the cursor
        vim.keymap.set("n", "K", function() vim.lsp.buf.hover() end, opts)                          -- Display hover information about the symbol under the cursor
        vim.keymap.set("n", "gr", function() vim.lsp.buf.references() end, opts)                    -- List all references to the symbol under the cursor
        vim.keymap.set("n", "<leader>vws", function() vim.lsp.buf.workspace_symbol() end, opts)     -- Search for a symbol in the current workspace
        vim.keymap.set("i", "<C-h>", function() vim.lsp.buf.signature_help() end, opts)             -- Display signature information in insert mode

        -- Diagnostics
        vim.keymap.set("n", "<leader>vd", function() vim.diagnostic.open_float() end, opts)         -- Show diagnostics in a floating window
        vim.keymap.set("n", "[d", function() vim.diagnostic.goto_prev() end, opts)                  -- Go to the previous diagnostic message
        vim.keymap.set("n", "]d", function() vim.diagnostic.goto_next() end, opts)                  -- Go to the next diagnostic message

        -- LSP Actions
        vim.keymap.set("n", "<leader>ca", function() vim.lsp.buf.code_action() end, opts)           -- Select a code action available at the current cursor position
        vim.keymap.set("n", "<leader>rn", function() vim.lsp.buf.rename() end, opts)                -- Rename all occurrences of the symbol under the cursor
        vim.keymap.set("n", "<leader>cf", function() vim.lsp.buf.format { async = true } end, opts) -- Format the current buffer asynchronously
    end
  },
}
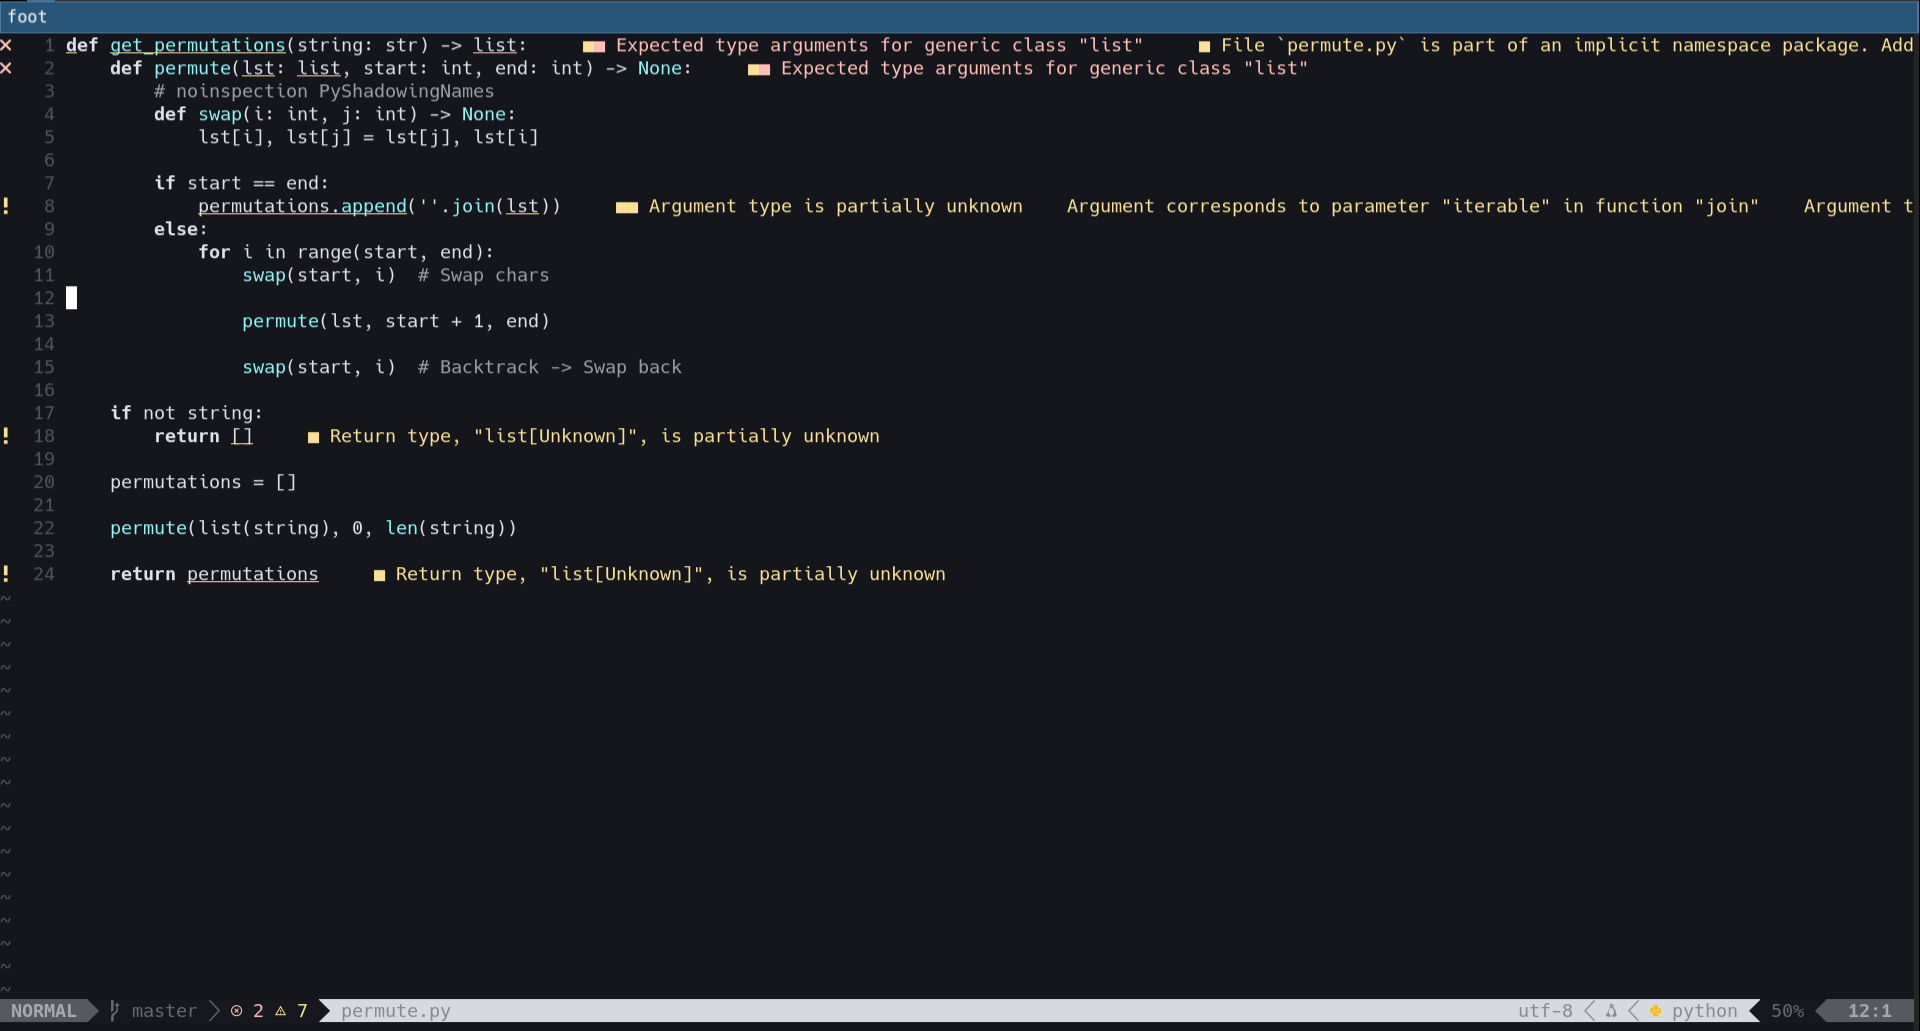
Diagnostic UI
Diagnostics are the red/yellow underlines and icons that tell you when you have a syntax error or a warning. By default, Neovim shows these, but we can make them much more elegant using a “floating” style and, even, custom icons.
Let’s put the configuration in ~/.config/nvim/lua/plugins/lsp.lua right inside the config function so it loads with your LSP:
1
2
3
4
5
6
7
8
9
10
11
12
13
14
15
16
17
18
19
20
21
22
23
24
25
26
-- ... inside the config = function() ...
vim.diagnostic.config(
{
virtual_text = true,
signs = {
text = {
[vim.diagnostic.severity.ERROR] = "",
[vim.diagnostic.severity.WARN] = "",
[vim.diagnostic.severity.HINT] = " ",
[vim.diagnostic.severity.INFO] = "i"
}
},
update_in_insert = false,
underline = true,
severity_sort = true,
float = {
focusable = false,
style = "minimal",
border = "rounded",
source = "always",
header = "",
prefix = ""
}
}
)
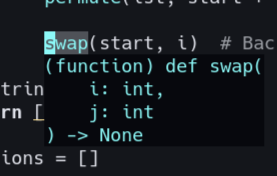
nvim-cmp
nvim-cmp is the “engine” that provides the autocomplete dropdown menu as you type, with it, Neovim feels like a modern IDE with “IntelliSense”.
nvim-cmpcan pull suggestions from:
- LSP: Variable names and functions from your code.
- Buffer: Words you’ve already typed in the current file.
- Path: File paths (e.g., when typing import ./…).
- Snippets: Pre-written blocks of code (like a “for loop” template).
~/.config/nvim/lua/plugins/completions.lua
1
2
3
4
5
6
7
8
9
10
11
12
13
14
15
16
17
18
19
20
21
22
23
24
25
26
27
28
29
30
31
32
33
34
35
36
37
38
39
40
41
42
43
44
45
46
47
48
49
50
51
52
53
54
55
56
57
58
59
return {
  {
    "hrsh7th/nvim-cmp",
    dependencies = {
      "hrsh7th/cmp-nvim-lsp",     -- Source for LSP
      "hrsh7th/cmp-buffer",       -- Source for text in current buffer
      "hrsh7th/cmp-path",         -- Source for file system paths
      "hrsh7th/cmp-cmdline",      -- Source for command line
      "L3MON4D3/LuaSnip",         -- Snippet engine
      "saadparwaiz1/cmp_luasnip", -- Snippet expansions
    },
    config = function()
      local cmp = require("cmp")
      local luasnip = require("luasnip")

      cmp.setup({
        snippet = {
          expand = function(args)
            luasnip.lsp_expand(args.body)
          end,
        },
        mapping = cmp.mapping.preset.insert({
          ["<C-b>"] = cmp.mapping.scroll_docs(-4),
          ["<C-f>"] = cmp.mapping.scroll_docs(4),
          ["<C-Space>"] = cmp.mapping.complete(), -- Manually trigger
          ["<C-e>"] = cmp.mapping.abort(),
          ["<CR>"] = cmp.mapping.confirm({ select = true }), -- Accept suggestion
          ["<Tab>"] = cmp.mapping(function(fallback)
            if cmp.visible() then
              cmp.select_next_item()
            elseif luasnip.expand_or_jumpable() then
              luasnip.expand_or_jump()
            else
              fallback()
            end
          end, { "i", "s" }),
        }),
        sources = cmp.config.sources({
          { name = "nvim_lsp" }, -- Highest priority
          { name = "luasnip" },  -- Snippets
        }, {
          { name = "buffer" },   -- Text from current file
          { name = "path" },     -- File paths
        }),
      })

      -- Use cmdline & path source for ':' (command mode)
      cmp.setup.cmdline(':', {
        mapping = cmp.mapping.preset.cmdline(),
        sources = cmp.config.sources({
          { name = 'path' }
        }, {
          { name = 'cmdline' }
        }),
        matching = { disallow_symbol_nonprefix_matching = false }
      })
    end,
  },
}
For nvim-cmp to talk to your LSP servers, you need to tell the LSP servers that Neovim is now “capable” of handling completion. Open ~/.config/nvim/lua/plugins/lsp.lua and update your config function to include the capabilities variable:
1
2
3
4
5
6
7
8
9
10
11
12
13
-- ... inside the config = function() ...

-- nvim-cmp
local capabilities = require('cmp_nvim_lsp').default_capabilities()

mason_lspconfig.setup_handlers({
  function(server_name)
    require("lspconfig")[server_name].setup({
      on_attach = on_attach,
      capabilities = capabilities, -- ADD THIS LINE
    })
  end,
})
Autoformat on save
Adding autoformat on save is the “cherry on top” for a professional IDE setup. It ensures that every time you hit :w, your code is instantly cleaned up according to industry standards.
To do this, we will use a plugin called conform.nvim. It is currently the fastest and most reliable way to handle formatting.
While some LSPs can format code, they are often slow or don’t support every language. Conform.nvim allows us to:
- Fallback logic: If one formatter fails, it can try another.
- Asynchronous formatting: It formats in the background so our UI doesn’t “freeze” while saving a large file.
- Language Specifics: It easily hooks into Ruff (Python), rustfmt (Rust), and clang-format (C).
~/.config/nvim/lua/plugins/formatting.lua
1
2
3
4
5
6
7
8
9
10
11
12
13
14
15
16
17
18
19
20
21
22
23
24
25
26
27
28
29
30
31
32
33
return {
  {
    "stevearc/conform.nvim",
    event = { "BufReadPre", "BufNewFile" }, -- Load when you open a file
    config = function()
      local conform = require("conform")

      conform.setup({
        formatters_by_ft = {
          python = { "ruff_organize_imports", "ruff_format" },     -- Fast Python formatter
          rust = { "rustfmt" },                                    -- Standard Rust formatter
          cpp = { "clang-format" },                                -- Standard C/C++ formatter
          c = { "clang-format" },                                  -- Standard C/C++ formatter
          lua = { "stylua" },                                      -- Great for your Neovim config!
        },
        format_on_save = {
          lsp_fallback = true,                                     -- Use LSP if no formatter is found
          async = false,                                           -- Set to true if you have huge files
          timeout_ms = 500,                                        -- Don't wait forever
        },
      })

      -- Optional: Keymap to format manually
      vim.keymap.set({ "n", "v" }, "<leader>mp", function()
        conform.format({
          lsp_fallback = true,
          async = false,
          timeout_ms = 500,
        })
      end, { desc = "Format file or range (in visual mode)" })
    end,
  },
}
Telescope
Telescope is a highly extendable fuzzy finder that lets you search through lists of files, git commits, help tags, and even your own code symbols.
In a traditional IDE, you usually have a file tree on the left. In a modern “keyboard-driven” workflow, you use Telescope to jump to a file by typing just a few letters of its name.
/.config/nvim/lua/plugins/telescope.lua
1
2
3
4
5
6
7
8
9
10
11
12
13
14
15
16
17
18
19
20
21
22
23
24
return {
  {
    'nvim-telescope/telescope.nvim',
    tag = '0.1.5', -- Use a stable version
    dependencies = {
        'nvim-lua/plenary.nvim',
        { 'nvim-telescope/telescope-fzf-native.nvim', build = 'make' } -- Makes searching even faster
    },
    config = function()
      local builtin = require('telescope.builtin')

      -- Keymaps to make searching fast
      vim.keymap.set('n', '<leader>ff', builtin.find_files, { desc = 'Telescope find files' })
      vim.keymap.set('n', '<leader>fg', builtin.live_grep, { desc = 'Telescope live grep' })
      vim.keymap.set('n', '<leader>fb', builtin.buffers, { desc = 'Telescope buffers' })
      vim.keymap.set('n', '<leader>fh', builtin.help_tags, { desc = 'Telescope help tags' })

      -- Search specifically in your config files (very useful!)
      vim.keymap.set('n', '<leader>en', function()
        builtin.find_files { cwd = vim.fn.stdpath 'config' }
      end, { desc = 'Edit Neovim config' })
    end
  }
}
For live grep to work we need to install ripgrep:
sudo apt install ripgrep
Configuring Ruff (Python code style and rules)
Ruff follows a specific hierarchy to resolve settings. It searches for a configuration file in the current directory and continues up the parent directories until it finds one.
Global Configuration (User-wide)
To apply rules to every Python project on your machine (as a fallback when no project-specific file exists), use the following directory: ~/.config/ruff/ with one of the following filenames:
settings.toml(Recommended)ruff.toml.ruff.toml
My settings.toml:
Do not use the [tool.ruff] header. Write properties directly at the root of the file.
Project Configuration
To apply rules to a specific project, place the file in the project’s root directory:
pyproject.toml(must use [tool.ruff] header and sections)ruff.tomlor.ruff.toml(direct properties, no headers)
My pyproject.toml:
Folder-Specific Configuration (Nested)
To override or extend rules for a specific subdirectory (e.g., allowing assert only in /tests or changing line lengths in /scripts), place a file inside that folder.
ruff.tomlor.ruff.toml
Screenshots
 lualine
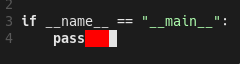 better-whitespace
 nvim-treesitter
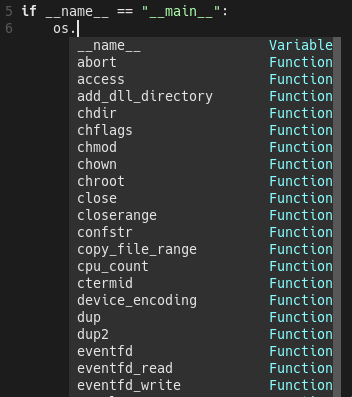 Code completions
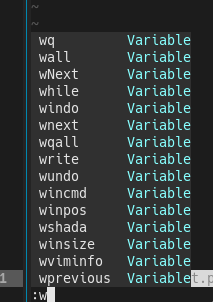 Console command completions
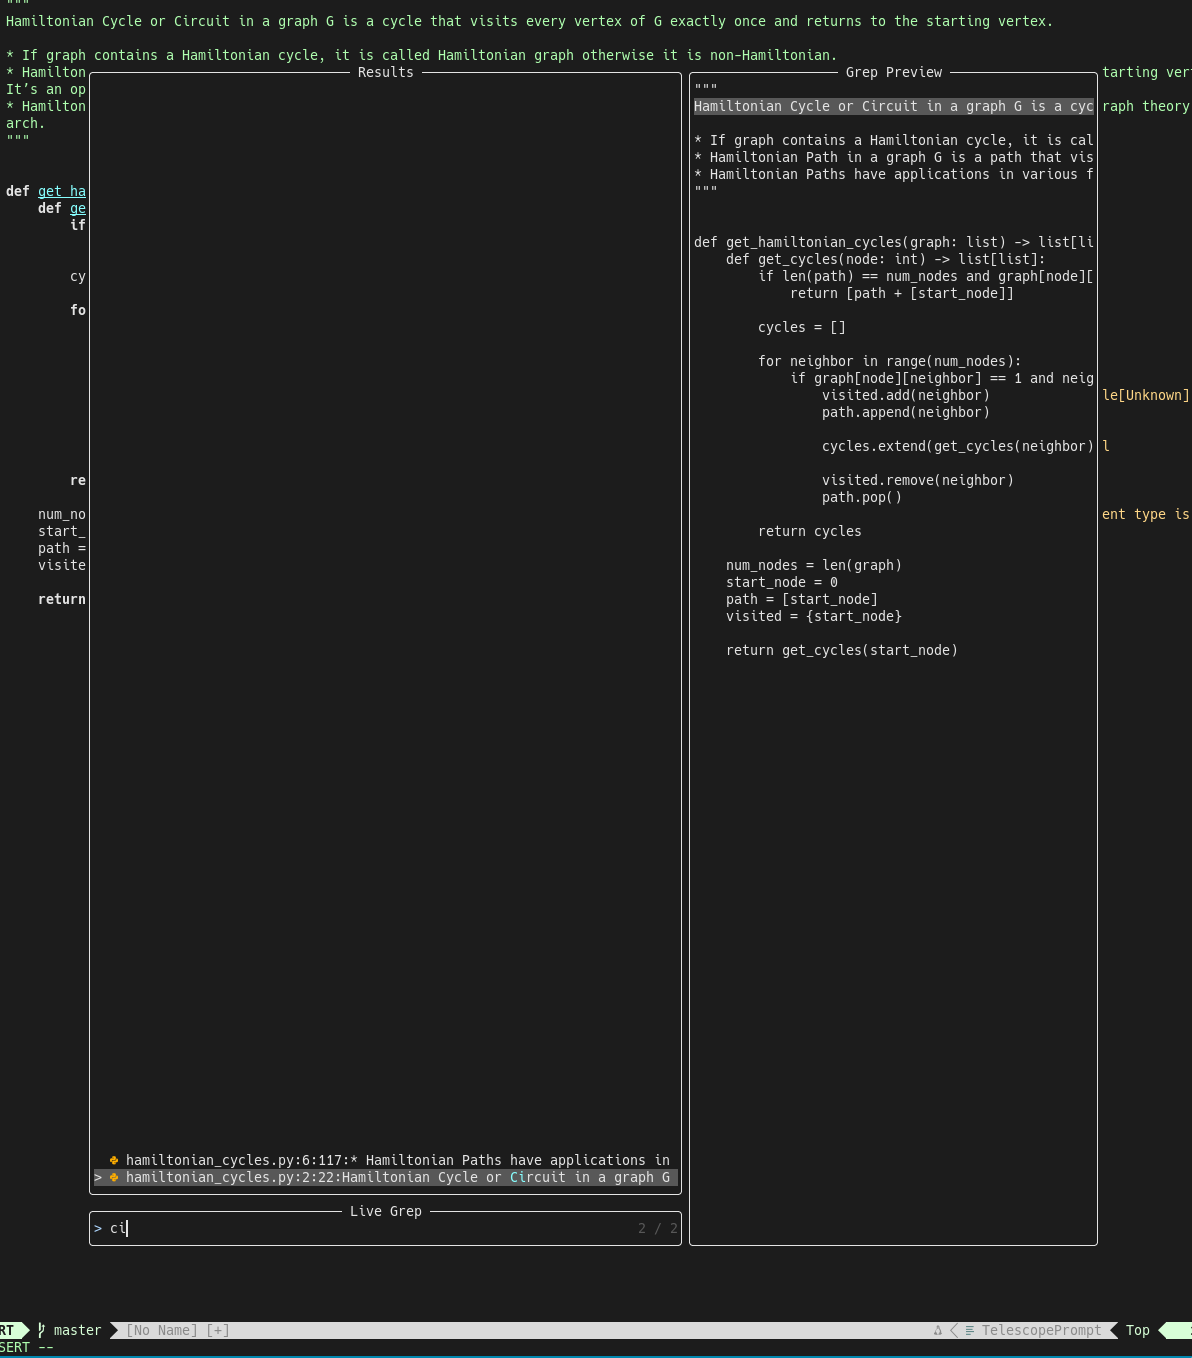 telescope (live grep)
 ruff linter example
 hover example
 full screen example
Thanks for reading! :)